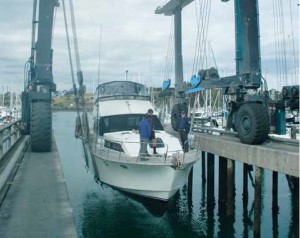
WHEN THE ‘NEW’ OWNERS OF MY COLONSAY, A 15M, 29 YEAR OLD TIMBER SEMI-DISPLACEMENT CRUISER KEPT EXPERIENCING MANOEUVRING PROBLEMS ENTERING AND EXITING THE TIGHT CONFINES OF THEIR BERTH IN THE GULF HARBOUR WATERWAYS, THEY DECIDED TO LOOK FOR A SOLUTION.
Being a twin engine, 29 ton flybridge cruiser with a lot of windage, made it a somewhat nerve-racking exercise especially if there was a strong wind blowing. Easiest solution was to fit a bow thruster. After looking around at the many brands that are available, they decided on a Vetus, the company that in 1982 designed and introduced the first bow thruster for pleasure boats. The next and most critical decision was to install one that was suitable for the boat.
A bow thruster delivers a side directional thrust force, so the greater the KGF (kilograms of force), the more powerful the thruster. In order to ensure the best performance under all sorts of weather and water conditions, the bow thruster should be able to provide a thrust force which is suitable, or rather: most sufficient, for the boat in which it has been installed.

In Vetus’s case they offer a wide variety of 12V, 24V electric and hydraulic thrusters to suit trailer boats from around 6m to cruisers over 30m. The force applied by the wind onto the boat is determined by several factors: wind speed, angle of wind attack and lateral wind draft area of the boat. You also have to take into account the size, weight and overall dimensions of the boat.
Vetus use a straightforward calculation table to figure out which thruster model will be most suitable for a given vessel. However, rather than go into a whole lot of technical jargon, we suggest you go to the Vetus website (www.vetus.com) which provides a lot more information on how to size the right bow thruster. Or contact your nearest Vetus dealer in your area.
Bow Thruster Installation Issues
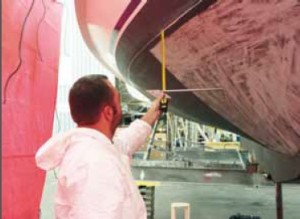
Nick Saull, Director of Brin Wilson Boat Builders, based in Gulf Harbour Auckland, who were given the task of doing the bow thruster install says, ”Also important measurement to take into account for the tube position is the distance below the waterline so maximum trust is achieved ”.
Vetus supplies a number of different tube sizes in fiberglass, steel and aluminium to exactly match each Vetus thruster model, ensuring that the maximum thrust is achieved without any cavitation or vibration.
The applied moment of the thrust force – which means to say: the position of the tunnel in the bow – is of prime importance for the bow thruster’s efficiency. The further forward the bow thruster is positioned, the greater the efficiency. It is important to note that the top of the thruster tunnel must be a minimum of half the tunnel diameter below the waterline. He adds, “We had to firstly inspect the boat to make sure we could install the unit, as with older boats it can sometimes be quite a complex job that requires extra woodworking. In the case of Colonsay it proved quite simple as there was plenty of available space under the sole”.
The Right Bow Thruster
Based on all the facts and after consultation with the technical people at Vetus, it was decided to install a Vetus Bow125. The 12v, Bow125 comes with a high quality, high output DC motor pushing out 57kW (8hp). It uses a bronze streamlined lower leg, with a single 6 blade propeller, specially designed to give maximum thrust, equal in both directions with less cavitation and less tunnel noise.
There’s also a flexible drive coupling, with no shear pin, an all up weight excluding the tunnel of 37kgs and the whole lot can be controlled from multi-stations. While the Vetus125 motor installed in Colonsay was in a vertical position because there were no space issues, the unit can be fitted on any angle from vertical to horizontal, however the motor requires support if it is placed on an angle. “We also have to consider the beam of the boat at the bow as we can’t have the thruster propellers protruding outside the hull”, added Nick. He says it is very important that the minimum depth under water is maintained and that you get the bow thruster as far forward as you can.
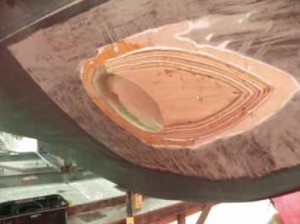
The process of installation started once the builders were happy that everything would fit and line-up as it should. The skilled boat builders at Brin Wilsons, first drilled pilot holes through the hull to determine the right position for the tube and then once that was checked, they put a stainless steel rod right through the hull. This was used to level the tube before they bored the main hole. The internal area around the tube position was then timber blocked between the stringers giving a flat surface so the tube can be fiberglassed to the hull and as an added bonus giving extra strength to the bow area.
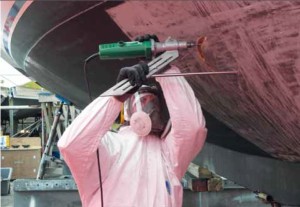
A specially designed die-grinder attached to a special jig makes an exact size hole for the tube. The die-grinder can be adapted to cut through virtually any materials, be it alloy, steel, timber or fiberglass and can be adjusted to cut any size hole.
Once the 250mm diameter hole was cut through the 36mm thick, triple skin Kauri hull, the tube was glued, glassed and trimmed in place. “We also add packers/wedges to the front of the outside of the tube on either side to help deflect the water away from the back of the tube when the boat is underway,” adds Nick.
Next stage was to fibreglass the outside, so there is no chance of any water ingress and then drop in the main drive unit. There is no precut available as every boat is different, so again the builders have to follow rigidly to the installation instructions pre-determined by Vetus.
Before the unit was finally fitted, the tube and outer areas are epoxy undercoated, and antifouled, plus all internal spaces are painted. Even the leg and propellers are antifouled before they are fitted, sealed and bolted in place. “It is a very simple exercise to bolt on the unit to the tube, although you have to be very careful in making certain the clearances inside the tunnel are perfect. Different thickness packers allow you to adjust the distance between the leg unit and the tube,” says Nick.
Powering Up
Once the installation was completed the next phase was to call in the sparkie. In this case Marine Electrics NZ (www.marineelectrics. co.nz) was asked to look into powering the new bow thruster on Colonsay.
Marine Electrics NZ, Gavin Dakers, says that he knew this was a fairly large thruster and would require a lot of power, so the first thing to do was a visit to the boat to assess what the current battery configuration was and how the thruster could be adapted into the existing system.
Being a 12 volt thruster the current draw specification was high. For the same size bow thruster, a 24volt unit would draw half the current that a 12volt model would. Colonsay’s existing batteries were three Hella Endurant N200. Two of these batteries were linked together in parallel as a house bank and the other single N200 battery was setup to start both engines and operate the anchor winch.
In many smaller installations you can power the bow thruster off the existing start battery, however in Colonsay he felt that the start battery, start battery switch and existing wiring to be too light to supply the new thrusters power requirements. A minimum supply of 1400CCA was needed.
This left two options:
1. Increase the existing start battery capacity and run 4 x 120mm heavy battery cables forward to the bow thruster via its own heavy duty battery switch and fuse,
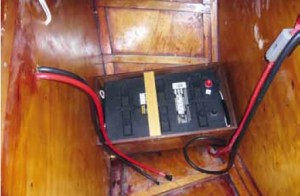
2. Install a high performance Hella Endurant CM1500 battery forward, adjacent to the bow thruster. This would have a local isolator and fuse installed forward between the battery and thruster. It also required charging cables to be run back to the existing start battery. This would connect through a BEP marine heavy duty voltage sensitive switch and heavy duty ANL fuse Both options were estimated and presented to the owner to consider. Due to the high cost of the 120mm battery cable it worked out more economic to fit a second battery forward. It also gave the advantage of having a second battery in the system to take demand off the single start battery that was already in high use.
By fitting the Voltage sensitive switch rather than a standard VSR, also gives the option to manually link the two batteries for emergency use. Control cables were also run to both stations to allow control from either location. It is possible to branch off to as many locations as required and even add a wireless control to assist with picking up dock lines, etc.
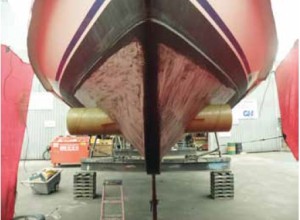
The Final Result

Since Colonsay has been back in the water, the owner’s have reported they now have total control over the boat in and around the marina. The Vetus Bow125 is doing exactly what is expected of it and maneuvering the boat, even in gusty winds is effortless. So what did it all cost?
Firstly the Vetus Bow125 unit, tube and controls will set you back around $NZ7000. The installation work carried out by Brin Wilson Boat Builders for a job like this runs anywhere from $NZ3500 – $NZ5000, depending on what structural adjustments have to be made. The electrical work from Marine Electrics was around $NZ3500 for Colonsay, but could be as little as $NZ1500, again depending on what is required. All up cost for peace of mind for the owners of Colensay when coming in and out of their marina was around $NZ15000.