Antifouling Made Easy
So the time has come and your boat finally requires a new coat of antifouling. As is typical with many facets of our lives these days you can seemingly be overcome by the choice of products available. However, once you apply logic the choices can usually be reduced. Let’s go through the process of deciding which antifouling you really need and then consider some hints and tips on how to go about putting it on.
First up, we need to decide what type of antifouling you want on your boat. You might simply be re-applying what you have used before so you can skip the next 3 or 4 paragraphs, although you may find them interesting regardless.
The types of antifoulings available can basically be split into two types, hard and eroding. You will probably find as well other descriptions such as ablative, polishing or self-polishing and all can be put under the umbrella of eroders.

The basic and original type of antifouling is the so-called hard antifouling. This is one that when immersed and in a wet state is hard enough to withstand regular wiping down with a cloth, sponge or similar object without removal of substantial quantities of paint. Some local authorities may only allow these types to be used so the decision may already have been made for you.
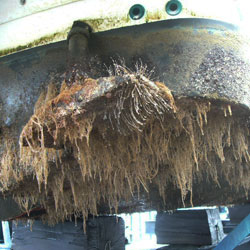
Hard antifoulings do not wear away much at all, although abrasive material in the water such as silt and sand may lead to a very minor reduction in film build. Eventually however, you are left after a few seasons with a build-up of product that requires removal because it becomes unsound and does not retain sufficient internal strength to be able to hold together when new product is applied to it.
If you have a seriously fast boat or a fast boat that is used very regularly then hard is probably the best way to go. Boats moored in fresh water normally use these types, as the eroding types may not erode very well. Keen racing types sometimes prefer hard products as they can be wet sanded to a smooth finish prior to racing.
The eroding types as their name suggests wash or wear away, leaving eventually no antifouling on your hull. In theory, whilst there is antifouling on your hull it will give a degree of protection. With the current generation of paints however, this does not happen because as the paint film starts to get thin, the biocides are preferentially washed out, leaving paint that essentially no longer has any antifouling properties. This is the time to apply new product.
Hull Condition

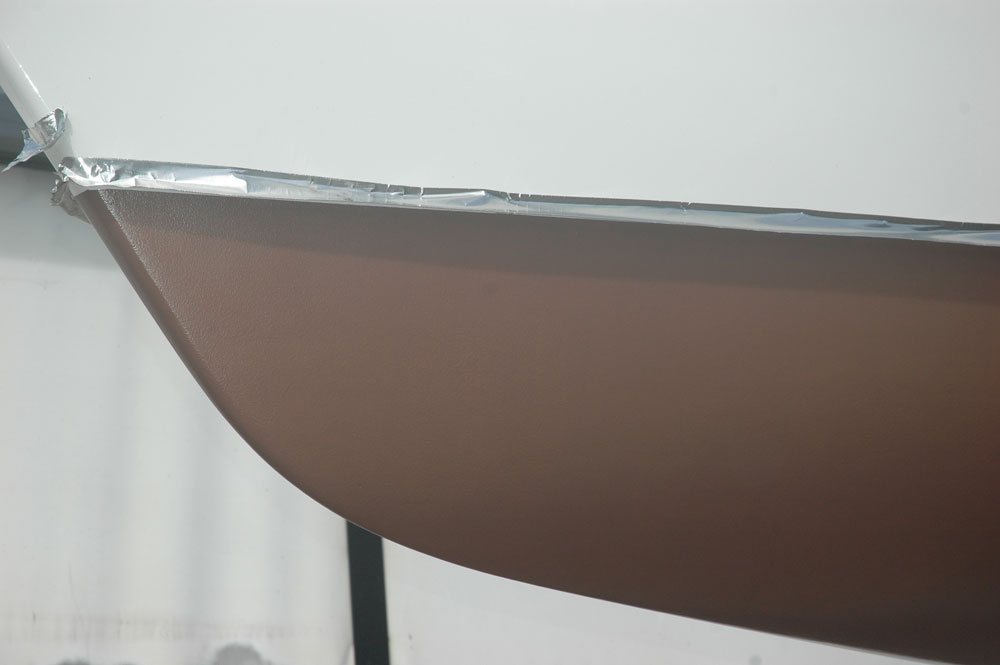
Having decided what antifouling you are going to apply, we need to consider the condition of your hull. Irrespective of which paint is already on your hull, if it is in good condition with no damage and is of a compatible type to that which you are going to apply, you will need to give the surface a good wet sand with 80-grit paper. This will remove the top layer of paint that is depleted in biocides, contains salt and calcium deposits and which will also be in an unstable condition unable to accept a new coat of paint. Failure to remove this layer will lead to blistering, delamination or even poor antifouling performance as ingredients and biocides in the new paint permeate back into the old depleted layer. So be warned – do this job properly!
If the paint is an unknown product, then after sanding and washing allow it to dry thoroughly and apply what we call a sealer/tie coat. This will seal the old antifouling off, avoiding any unwanted interaction between old and new and will give you a good surface that the new antifouling can bond to.
Do not be tempted to apply a coat of sealer/tie coat over old unsound antifouling in the hope that it will hold it all together and allow new antifouling to be applied over the top. It would be good for our business as we get to sell you more paint when it all falls off but it is going to be very bad for your bank balance. Do it once and do it right!
If the hull has damaged areas then these will require re-priming. If your hull is new then choice of priming is an individual matter. A two-pack epoxy primer will give you a harder, tougher finish and for gel coated boats will offer a degree of osmosis resistance. Epoxies usually require a fair degree of sanding and for small touch ups mixing small amounts of a two-pack product with special thinners and cleaners can become a major headache.
Area of the Hull
Before purchasing your antifouling, work out the area of your hull in order to ensure that you purchase sufficient product. Insufficient film build of antifouling is the single largest cause of premature failure.
Once you have the antifouling, apply all of what you have. Putting some aside for next year is not a good idea as the product may go off in a part can. Part cans may then become a disposal problem. Better to put the paint on your hull than in some waste disposal area. Ensure that you apply the antifouling reasonably evenly, adding only very minor levels of thinners to help the product flow out.
Areas on the hull that you would expect to have greater wear should have at least an extra coat applied and this includes areas that may have direct sunlight on them such as the first half metre or so down from the waterline and any leading edges such as keels and rudders.
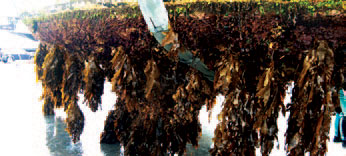
Grassy growth and slime just love sunlight and are the most difficult species to ward off; so extra paint will help keep these obnoxious species away. Areas under the hull in the dark will generally not attract fouling species so readily, so extra coats will not necessarily be required there.
Protect the Antifouling
Once you have finished painting, protect the antifouling from the sun as some ingredients in antifouling paints can oxidise, leading to reduced performance when immersed.
If after antifouling your boat it gets to sit on the hard stand for some days in hot weather or direct sunlight it might be a good idea prior to launching to lightly wet sand the surface with 400 grade paper just to ensure the surface is good and active.
It is a fact of life that when you launch your boat the antifouling will not start working straight away. It will take some hours for it to come to equilibrium with its surroundings. Meanwhile, floating around in the water are millions of small fouling species on the lookout for a clean surface to colonise and if you are unlucky enough to place your boat directly in a patch of such activity the result can be premature fouling. This problem can only be resolved by giving the surface a good hard scrub or light wet sand depending on the type of antifouling used – scrub hard types and light sand eroding types. Never, ever, dry sand antifouling paints of any type.
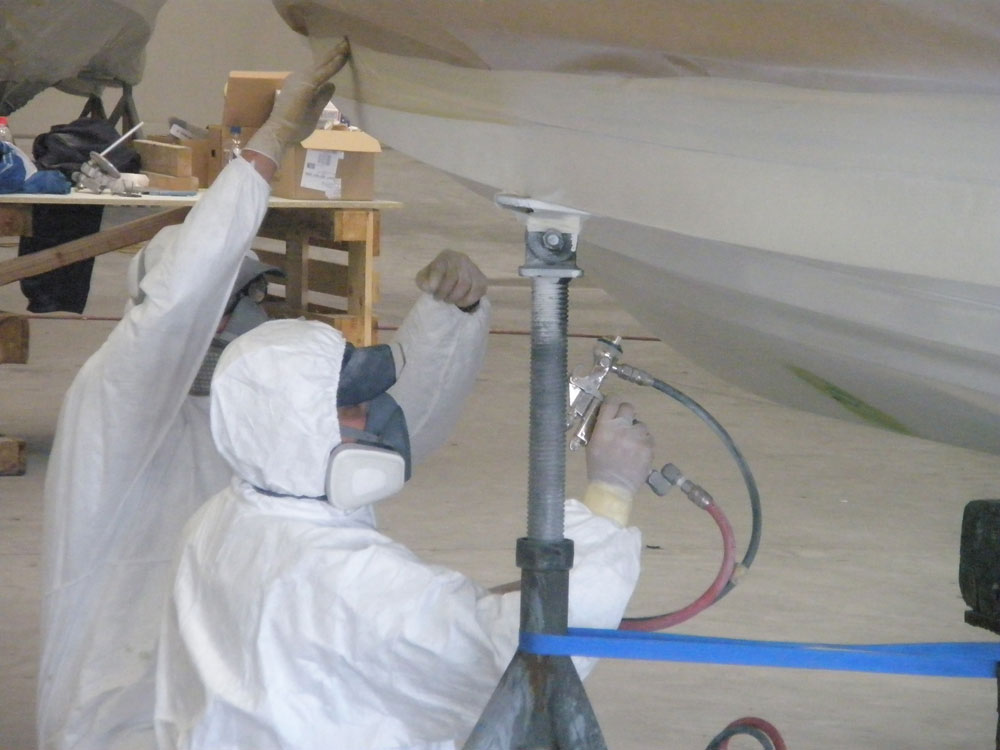
When handling any of the above-mentioned paints, please remember to wear the appropriate safety gear. It is often uncomfortable and adds expense to an already expensive job, but it’s better than a trip to the hospital. Even when wet washing down old antifouling, care should be taken to avoid splashes in the eye or on bare skin. It might not cause you any immediate obvious reaction or pain, but it can all add up to problems later in life.
Hopefully, by now you will be somewhat more enlightened, so do the job properly before you go and have fun and enjoy the rewards of being out on a good clean-bottomed boat.
Running Gear Protection
There are a number of specialist coatings designed to prevent marine growth from bonding to metal surfaces on your running gear. These are usually made up of an etching primer, which bonds to the metal substrate and a clear coat, which provides an ultra-smooth outer layer. It’s so slick that marine growth can’t get a grip on.
Combined they provide an integrated coating system that stays firmly adhered to the running gear, that dramatically reduces the ability for fouling to occur. They are suitable for all running gear under the water, such as propellers, rudders, shafts, struts, underwater lights, trim tabs, pod drives and thrusters.
Some claim they will will effectively protect running gear from marine growth for 1 to 2 years, requiring no maintenance. Any marine growth that does attach can be easily wiped away with a soft cloth while still wet.
EPA Reassessment of antifouling
Although most boat owners will not have been aware of it, over the last few years the government’s Environmental Protection Agency (EPA) has undertaken a significant reassessment of all the antifouling paints used in New Zealand. The aim has been to ensure that both the environment and those applying the paints are properly protected, preferably without unduly compromising the effectiveness of the antifouling paints.
The good news for the owners of moored boats is that, while antifouling manufacturers, retailers and boat yards will be affected (some quite seriously) by the resulting new rules, there will be little impact for the owners of most moored pleasure boats.
One of those heavily involved in the consultation process with the EPA was Mike O’Sullivan, managing director of New Zealand marine and commercial paint manufacturer Altex Coatings Ltd.
He says New Zealand is “leading the way” with this reassessment of antifouling paints and their application.
“We know that many other countries are looking closely at what is happening here,” he says.
Good Outcome
Highly supportive of the EPA’s aims of protecting both the environment and those using antifouling paints, he believes the outcome of the review is a good one, despite the fact it will have a significant impact on his company.
“I think we will look back on this in a year’s time and think that it was a progressive and logical step forward in today’s health and safety conscious world.”
The new rules which came into effect in Jan 2014, also require antifouling paint manufacturers and importers to provide more detailed data and safety information on the label of every can of antifouling. In addition, each can must also be accompanied by a Safety Data Sheet, either attached to the can or provided by the retailer.
Application Changes
Those applying antifouling (especially professionally) and those providing the space for it to be applied will also be affected by the new regulations.
From July 1, 2015, anywhere antifouling is being scrubbed down, sanded or painted will need to be clearly designated as a Controlled Work Area. Within this Controlled Work Area, ALL waste will need to be contained so that it cannot enter the environment. This includes all sanding dusts, sanding liquids and anything else that is produced by the application or maintenance of the antifouling.
Once contained, this waste must then be collected and disposed of in accordance with very strict regulations.
All Controlled Work Areas will also require detailed signage (large enough to be clearly visible from 10 metres away). This will need to state that antifouling maintenance and/or application is taking place; that, at all times, everyone within the Controlled Work Area must be wearing the appropriate PPE (Personal Protective Equipment); and display the name and contact details of the person who has established the Controlled Work Area.
Those intending to spray apply antifouling will also need to install suitable screens around the boat to ensure that no antifouling paint is able to escape the Controlled Work Area and affect any other person or boat or any waterway or part of the surrounding environment. Everyone involved in the spray application must also wear an appropriate respiratory PPE.
Professional boat maintenance yards and hard stands (such as Orams Marine in Westhaven) already do all of this and so are unlikely to be too seriously affected. However, some yacht club yards and smaller hardstand areas will need to work hard to ensure they are compliant by the 2015 deadline.
Because most boat owners who apply their own antifouling do so using brushes and rollers (as opposed to spray painting), they will not be too badly affected by the changes.
They will, of course, no longer be able to use some of the more informal ways of applying antifouling, such as on careening grids, slipways or beaches. However, this will have little effect on most, especially in larger centres, as local and regional councils have long banned such practices anyway.
Cover Up
DIY-ers will also, mainly for their own health, no longer be allowed to dry sand antifouling, all sanding will need to be wet. In addition, Ron Brown, Altex’s pleasure marine manager, recommends that they use a pole sander, to provide some distance between themselves and the dust and debris created by the sanding.
All those applying or doing maintenance on antifouling will also need to wear the appropriate PPE including full suit overalls (including head coverings), safety glasses or goggles, suitable protective gloves and closed-in footwear.
Brown says DIY-ers should also be aware of some key “do nots” when re-applying antifouling.
He says people should not try to apply antifouling coatings between tides, should not add additives or excessively thin the antifouling, should not over- or under-build the film thickness (use too much or too little antifouling) and should not try to re-launch their boat before the antifouling is completely dry.
“Properly applied, good quality antifouling will still give very good protection for up to two years (and in some cases considerably longer).